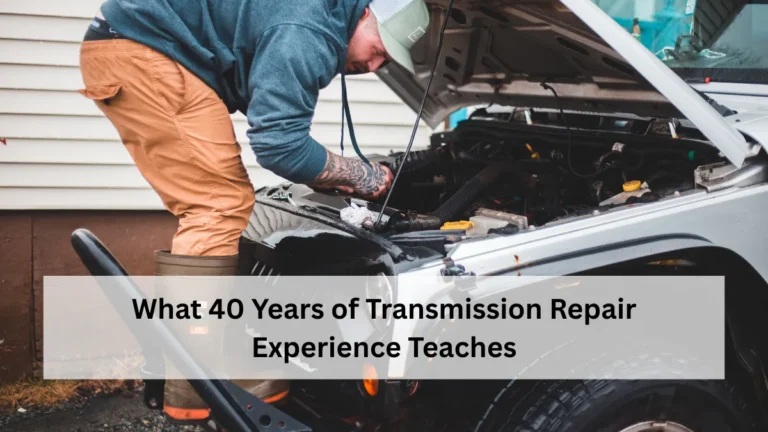
Automatic transmissions keep our cars moving smoothly through daily commutes, family road trips, and everything in between. But when they start slipping, hesitating, or making odd noises, it can turn a simple drive into a stressful ordeal. For many folks in the US, from busy parents in California suburbs to retirees in Florida, a transmission issue means unexpected downtime and repair bills that hit hard.
The real problem? Not every shop or technician handles these repairs the same way. Inexperienced hands can lead to misdiagnosis, repeated fixes, or even bigger damage down the road. I’ve seen it time and again—cars that could have been back on the road in a day end up sidelined for weeks because the first repair missed the mark.
This guide breaks it down: why these problems happen, how experience makes all the difference, and clear steps to get it right. Whether you’re dealing with your own vehicle or helping a family member, understanding this can save you time, money, and headaches.
Common Transmission Problems Drivers Face
Slipping gears top the list of complaints I hear in the shop. Your car might rev high but barely accelerate, especially when climbing a hill or merging onto the highway. It’s frustrating, especially during rush hour on I-95 in the Northeast.
Another frequent issue is delayed engagement. You shift into drive or reverse, and there’s a pause—like the transmission is thinking it over—before it catches. This delay worsens over time and can leave you stranded at a stoplight in downtown Chicago.
Harsh shifts feel like a jolt, as if the car is bucking. Overheating transmissions throw warning lights or strange smells, common in hot Texas summers when towing a trailer. And leaks? Fluid puddles under the car signal trouble fast.
These aren’t rare; AAA reports millions of transmission-related breakdowns yearly across the US. Ignoring them leads to complete failure, with tow trucks and shop visits that no one wants.
Why Inexperience Leads to Bigger Issues
Automatic transmissions are complex beasts—think of them as the brain of your drivetrain with valves, clutches, solenoids, and torque converters all working in sync. A newbie might grab a scan tool, see a generic code, and slap on a quick fix without digging deeper.
For instance, a slipping transmission often points to low fluid, but an inexperienced tech stops there, topping it off without checking for wear in the clutches. Months later, you’re back with the same problem, plus burnt fluid from overlooked contamination.
Overheating? Heat expands seals and warps parts. Without experience, a tech might blame the radiator and ignore torque converter issues or clogged coolers—common in high-mileage Fords and Chevys from the Midwest.
USA roads add unique stresses: stop-and-go traffic in LA, salted winters in Michigan that corrode pans, or heavy loads in the Rockies. Inexperienced repairs overlook these, leading to repeat failures. I’ve pulled apart transmissions where prior “fixes” used the wrong fluid, causing seals to swell and fail prematurely.
The core reason? Transmissions demand diagnostic finesse. Codes don’t tell the full story; fluid color, pressure tests, and road tests do. Experience spots patterns—like how a 2012 Honda Odyssey from suburban Ohio often slips due to specific solenoid wear, not just fluid.
Rushing a rebuild without proper teardown risks missing cracked drums or stripped gears. That’s why shops with green techs charge less upfront but cost more long-term. Data from repair networks shows experienced techs resolve issues 30% faster on first try.
Step-by-Step Guide to Reliable Automatic Transmission Repair
Experience shines in methodical diagnosis and repair. Here’s how a pro approaches it, step by step. Follow this whether you’re evaluating a shop or learning basics for your own maintenance.
Step 1: Thorough Initial Inspection
Start with a visual check under the hood and beneath the car. Look for red or brown fluid leaks around the pan, cooler lines, or seals—common on front-wheel-drive cars like Toyotas in sunny Arizona.
Check the dipstick: Fluid should be pink and clean, not dark or gritty. Smell it too; burnt odor means internal wear. Note the level hot and cold, as it expands with heat.
Road test next. Drive normally, then force shifts uphill and in stop-go. Listen for whines, feel for slips or thumps. Note exact speeds and conditions—vital for codes later.
Scan for trouble codes with an OBD-II tool, but don’t stop there. Experience interprets them against symptoms, like P0700 pointing to broader TCM issues in Dodges.
Step 2: In-Depth Diagnostic Testing
Pressure test the line—should hit 55-65 PSI in drive for most units. Low pressure screams pump wear, seen often in GM trucks from Texas haulers.
Stall test checks torque converter clutch: Rev to 2,200 RPM in drive with brakes on. No higher means slip inside.
Bore scope the valve body if possible—experience spots stuck valves without full teardown. Fluid analysis lab tests for metal particles, pinpointing gear wear early.
For electronics-heavy modern transmissions (post-2010), scope signals from solenoids. In a Seattle shop, we caught a faulty sensor on a Subaru before rebuild.
These tests take time—1-2 hours—but prevent guesswork.
Step 3: Disassembly and Component Assessment
Drop the pan and inspect filter/screen for debris. Major metal shreds? Gears are toast.
Full teardown requires pulling the transmission—bench work reveals hidden damage. Pros measure clearances with micrometers; clutches should have 0.010-0.030 inch endplay.
Inspect hard parts: Drums for cracks, planets for scoring, bands for glazing. In Florida humidity, aluminum parts corrode fast—experience knows to upgrade seals.
Valve body gets ultrasonic cleaning and air checks on every valve. Rebuild kits vary by model; wrong frictions spell early death.
Step 4: Precise Rebuild and Reassembly
Replace all soft parts: Seals, gaskets, clutches, bands. Use OEM or quality aftermarket—cheap kits fail quick.
Upgrade where experience dictates: Extra clutches in high-stress units, like Jeep Grand Cherokees in Colorado trails.
Torque everything to spec—bolts at 10-15 ft-lbs, pan at 8-10. Fill with exact fluid type (e.g., Mercon LV for Fords, not universal).
Air check clutches post-assembly to confirm operation.
Step 5: Installation, Testing, and Final Checks
Bolt back in with new mounts and cooler lines flushed. Update software if applicable—modern Chryslers need it.
Fill fluid hot, cycle gears 10 times, check levels. Road test 20-30 miles, varying conditions.
Pressure test again. Monitor temps under load—over 200°F signals issues.
Final fluid top-off and pan gasket check after 500 miles.
This process, done right, lasts 100,000+ miles.
Helpful Tips and Common Mistakes to Avoid
Always use the right fluid—mixing ATF types gels up valves, a mistake I’ve cleaned up from DIYers in rural Pennsylvania garages.
Skip “flush” machines; they blast debris into solenoids. Drop pan and replace 3-4 quarts manually instead.
Don’t ignore warning lights. A “limp mode” in a Nissan Altima protects the unit—towing it prevents further slip.
Budget for diagnostics upfront; $150-300 beats $4,000 rebuilds. Ask shops for test sheets.
Common error: Overfilling fluid, foaming it and causing slips. Check on level ground, engine running, after warmup.
Winter tip for Northern states: Warm up before hard shifts to avoid cold shock.
Prolong life with cooler installs—$200 part drops temps 30°F, essential for Vegas taxis.
Watch towing: Exceed ratings, and torque converters fry.
FAQ’s
What are the first signs my automatic transmission needs repair?
Early clues include slipping (RPMs rise without speed gain), delayed shifts, or unusual noises like whining. Check fluid first—if low or burnt, address it promptly to avoid escalation.
How much does automatic transmission repair cost in the US?
Expect $1,500-$3,000 for rebuilds on common cars like Hondas or Fords, varying by location and vehicle. Diagnostics add $100-200; always get itemized quotes.
Can I drive with transmission problems?
Short distances only if safe—no slipping or overheating. Tow it if symptoms worsen to prevent total failure, which doubles costs.
How long does a professional transmission repair take?
3-5 days typically, including teardown and testing. Rush jobs risk errors; patience pays off.
✨ You May Also Like ✨